tl;dr Install Visual Studio 2019 with C++, run setup script here, configure your undervolt, build. Copy the files to a USB. Reboot, set the BIOS to boot the shell from USB.
I hate my laptop when the fans rage on even with the slightest workload. The heat is unbearable, and the laptop constantly stutters due to thermal throttling. That's what I experienced after upgrading to Windows 11 because ThrottleStop has stopped working.
Windows 11 switched to Virtualization Based Security (VBS) that blocked access to the registers in the CPU that was necessary for undervolting to work. As a result, ThrottleStop, Intel XTU, and other voltage control tools have stopped working, unless you have virtualization disabled. The problem is many of us developers depend on Windows Subsystem for Linux (WSL) and Hyper-V. Turning virtualization off is not an option.
So smart folks come up with a solution. They load a program called PowerMonkey before booting Windows 11. This way we can set the undervolt values before VBS locks down the registers. However, this solution is difficult to use.
Discussions:
TechPowerUp - throttlestop dead on windows 11
Does Throttlestop not work on Windows 11 for anybody else?
Then what do we need to do?
- Finding your undervoltage
- Compile PowerMonkey
- Install to either a USB stick or the boot partition
- Enter BIOS to disable Secure Boot and change the boot order to boot PowerMonkey
Finding your undervoltage
If you are already using ThrottleStop or other similar programs. You can skip this step.
Otherwise, you will have to temporarily disable virtualization and run ThrottleStop to figure the stable undervolt. You can use The ThrottleStop Guide if this is your first time undervolting. After you find stable values for your device, please write them down so you can reference them
Compile PowerMonkey
Compiling PowerMonkey is a very long process. It involves quite a bit of different tools and software. Below is a list of what I used.
- Windows 10 build 17063 and newer
- Visual Studio 2019 (C++ Workload)
- Git
- Python 3.10.0
- NASM 2.15.05
- EDK2
- PowerMonkey
First of all, you will build on Windows 10 build 17063 or newer and have Visual Studio 2019 with C++ workload installed. Git should come with Visual Studio.
I have prepared some scripts here to automate downloads and compile everything else. If you prefer to use this script, open a command prompt and clone the repository, and run setup.bat and build.bat.
git clone https://github.com/awyl/Build-PowerMonkey
cd Build-PowerMonkey
setup.bat

@REM Edit your undervolt in CONFIGURATION.c before continuing.
@REM and make sure you are back to Build-PowerMoney folder before running
@REM the following command.
timeout /t -1

build.bat
Run setup.bat. There is a new file called CONFIGURATION.c copied to the folder. Edit it in your favorite text editor. It should be self-explanatory and mostly have corresponding settings in the FIVR menu in ThrottleStop. Inside you will replace the default values with your undervolt values that you have written down in the previous section.
In a nutshell, overwrite the following in CONFIGURATION.c:
// Your CPU Core value
pk->Domain[IACORE].OffsetVolts = -125;      // in mV (negative = undervolt)

// Your CPU Cache value
pk->Domain[RING].OffsetVolts = -125;       // in mV (negative = undervolt)
I do not need to adjust other settings, so I mostly commented out the rest. You can see my configuration here. I undervolted my CPU core and cache -132mV, and everything else untouched.
Then you run build.bat. The script builds the PowerMonkey.efi inside an EFI folder.
The next two sections briefly explain what the scripts do. Feel free to skip if you are not interested. Jump to how to install.
setup.bat
First, we download EDK2 source code and then PowerMonkey source code. We then move PowerMoney into EDK2 application folder and add PowerMoney to EDK2 workspace. Create the target file to tell EDK2 about the compiler and target architecture.
Then we download embeddable Python. We use the embeddable version because I do not want to mess up your dev environment. Since embeddable Python does not come with Pip, we have to install it on our own. So we do that.
Next, we download NASM, a requirement to compile EDK2. The last download is a precompiled shellx64.efi binary. Its configuration is written as startup.nsh in the same folder. We use this shellx64.efi chain boot PowerMonkey then Windows.
We set the environment variables. Pip installs all the required python packages for EDK2. Finally, we can build the EDK2 build tools to compile PowerMonkey.
Note that sometimes the script will not return to the base Build-PowerMonkey folder. Remember to run build.bat in the base Build-PowerMonkey folder.
The instructions are based on the following pages:
EDK2 Windows Setup
PowerMonkey GitHub
Setup Embeddable Python with Pip
build.bat
This script builds PowerMonkey.efi and copies it into the EFI folder. Remember to run it in the base Build-PowerMonkey folder.
Install to either a USB stick or the boot partition
You can either use an SD card, a USB stick or Windows's EFI partition. I recommend trying on an SD card or USB stick in the beginning. You can copy the files to the EFI (boot) partition later when you are comfortable.
SD card / USB stick. All you need to do is copy the EFI folder onto the root folder. Open \EFI\Boot\startup.nsh, and change fs0 to fs1 if your EFI partition is in the first drive.
Boot Partition. Open a command prompt with administrative privilege. If your computer may have different disk configurations. You can check with Disk Management in Windows. To Open, run diskmgmt.msc in a command prompt. Pay attention to the red marks. You need to find the EFI partition in diskpart with these clues.
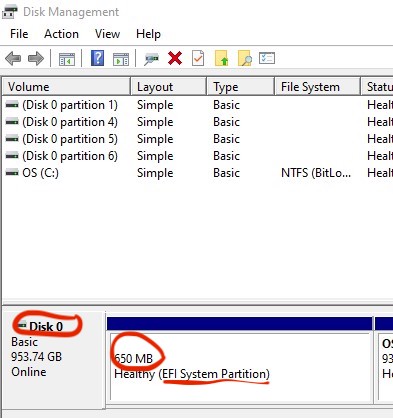
Below is an example of how to access your EFI partition.
diskpart
> list disk           <- list all the disks
> sel disk 0          <- select the disk with EFI parition
> list part           <- list all your partitions
> sel part 0          <- select your EFI partition
> assign letter=m     <- give your EFI a drive letter M:
> exit
Now M: is your drive. Still in the same command prompt, copy the EFIfolder to M: drive.
copy C:\Build-PowerMonkey\EFI\Boot\* M:\EFI\Boot
Enter BIOS to disable Secure Boot and change the boot order to boot PowerMonkey
Whew! Finally goes into the BIOS. For my Dell, I press F2 when power on.
Disable Secure boot 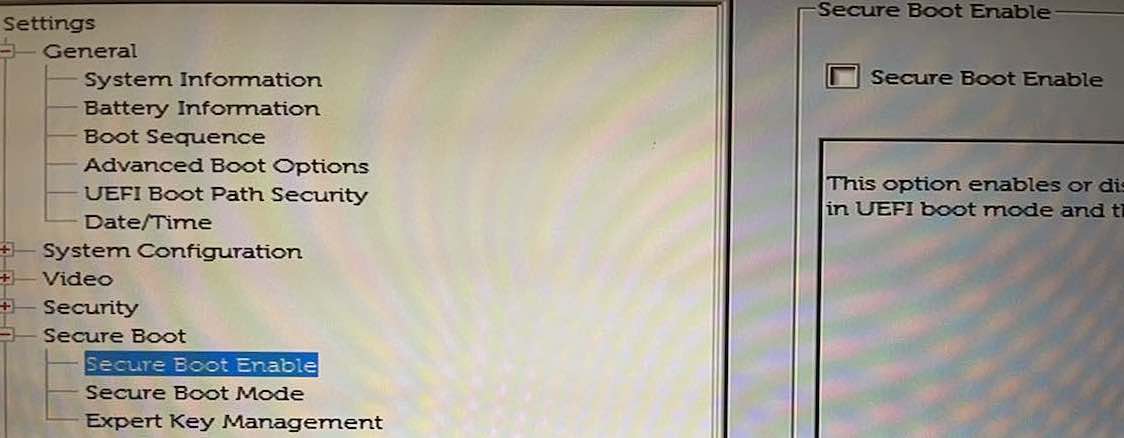
Set the BIOS to boot from SD/USB or your EFI partition 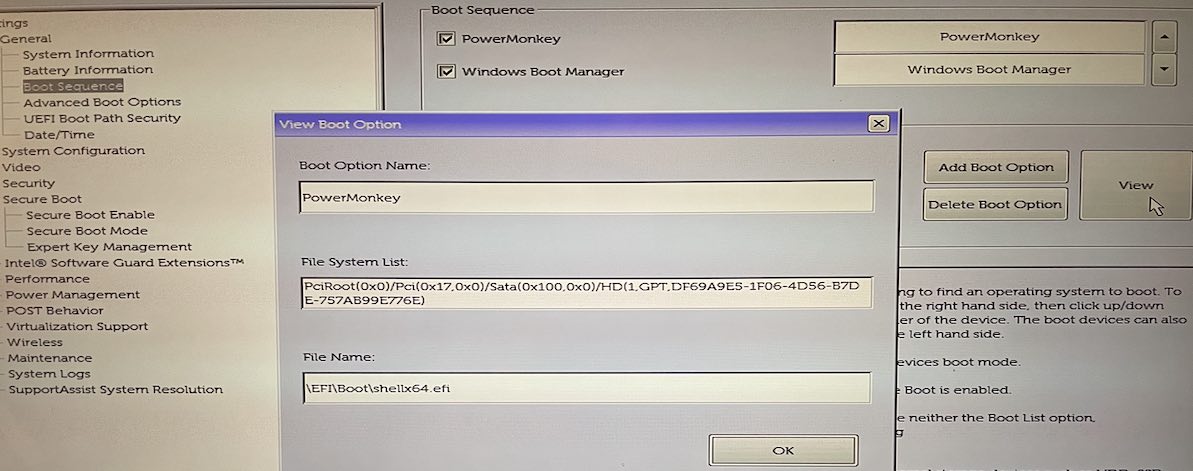
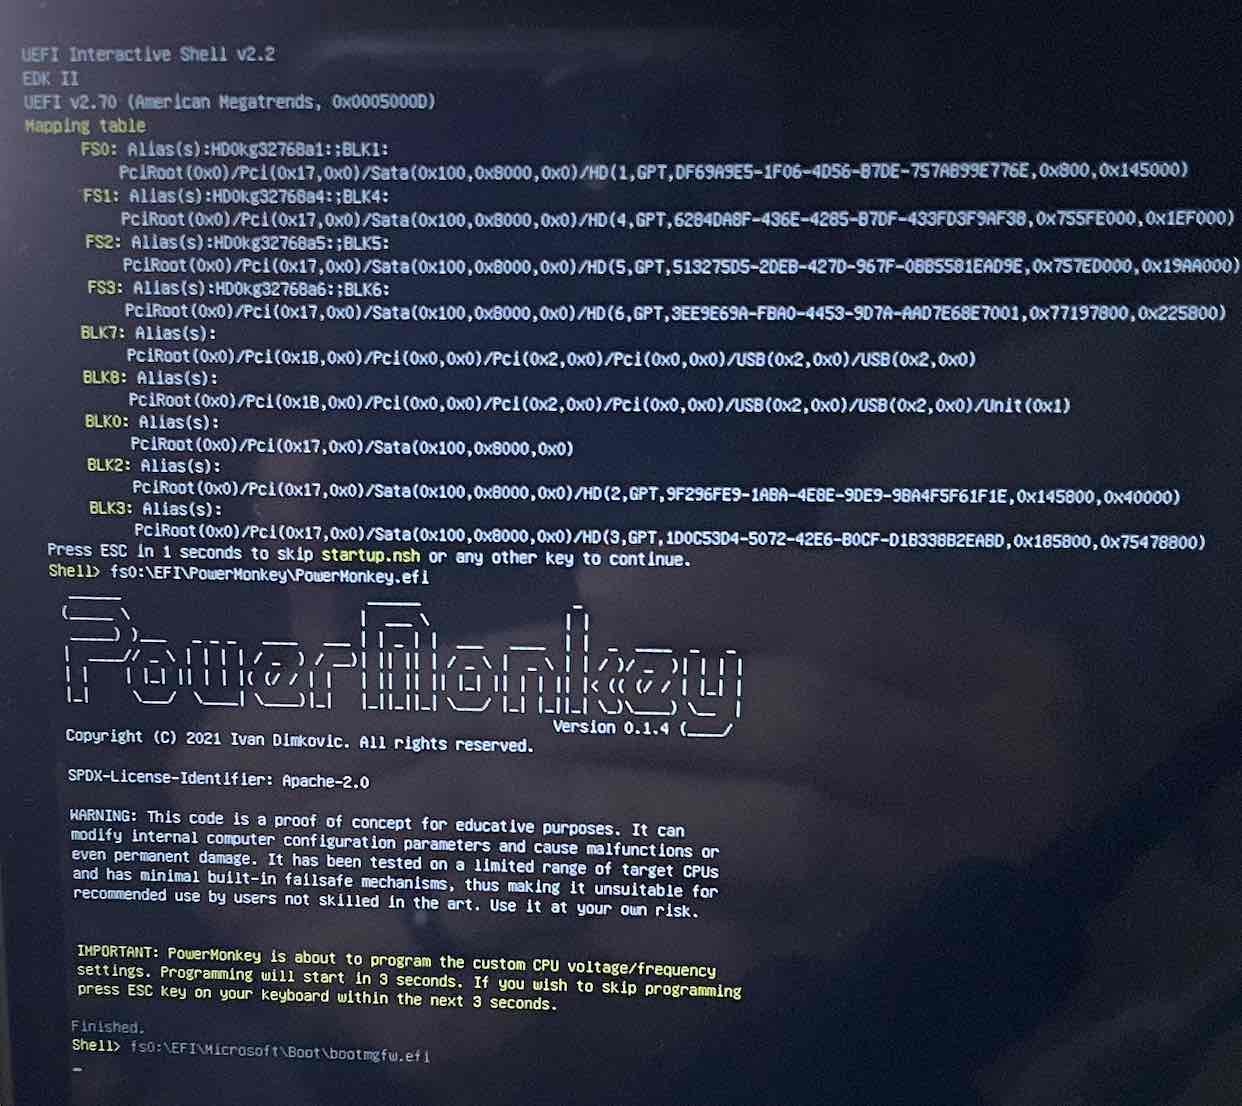
If you are successful, you should see something like this.
Thank you for reading, and good luck!